No Code event guest list app tutorial
It's never been easier to build a custom guest list app for your event without the help of developers. This tutorial will show you how to build within hours. The power of no code not only saves you time, but also allows teams to iterate with ease of mind on fast changing business requirements specially true for events.
Note: the tutorial below utilizes Airtable as one of the easist no-code methods to build custom UI. But the result is not fully a custom App that you can install on your devices.
Think through your
First most importantly, think through what information of your guests you need to manage, and the functionality you want to add to your app.
At a minimum, you would want to have Name and an additional field(Phone, Company etc.) to uniquely identify each guest. (in case there are same names in your guest list)
Then to checkin your guests, you would need a checkbox to mark them as checked in.
Additional information fields can be added for easier management of your guests such as lists(VIP, media, paid/free, etc.), table arrangements, etc.
Tools to use
In this tutorial, we will be using Airtable as the guest list database and the recent Interface Builder feature of Airtable to build the custom app.
Go ahead first to register free Airtable.
You may download the airtable app in your iPad/iPhone to later test and use the app.
Setup database
Create new base in Airtable.
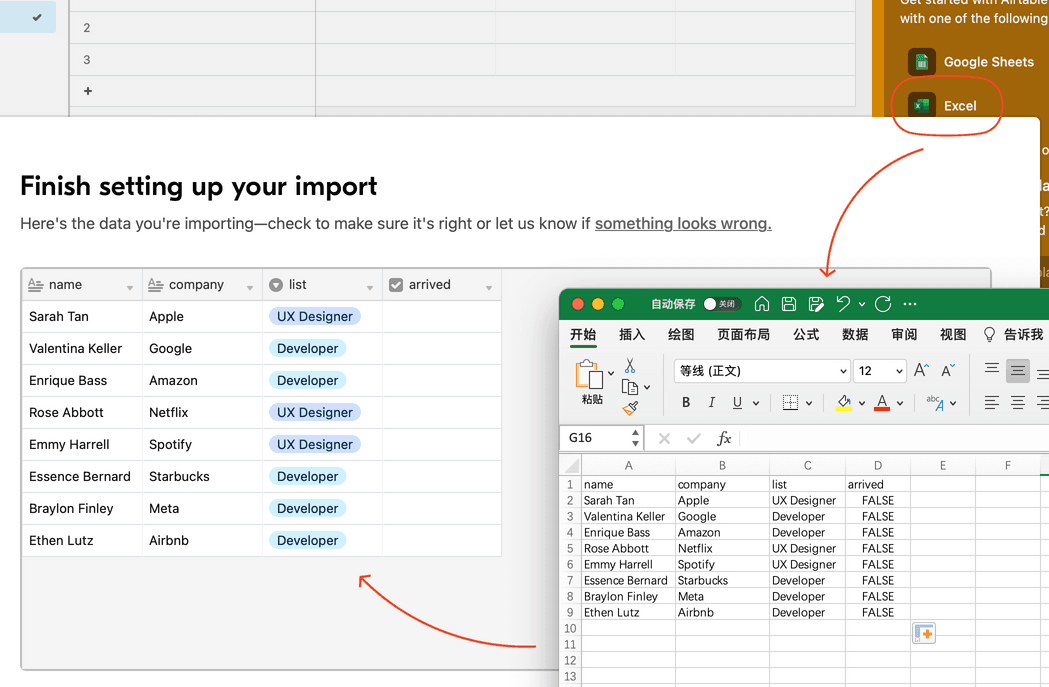
You may start from scratch and add columns then guests to your base in Airtable. But we will do it all in one step by importing existing excel file.
Airtable will try to recongize the type of the column automatically while importing. For example, when the values in the excel are somewhat repeating (like "VIP", "Media", "Paid", "Free"), Airtable will recognize it as a single select column. Also if the values are TRUE/FALSE, Airtable will recognize it as a boolean column. Prepare you excel file this way will make it easist to import.
Build app
Click interfaces button at top left corner to open interface designer.
Add first layout of your app. Select Record review layout.
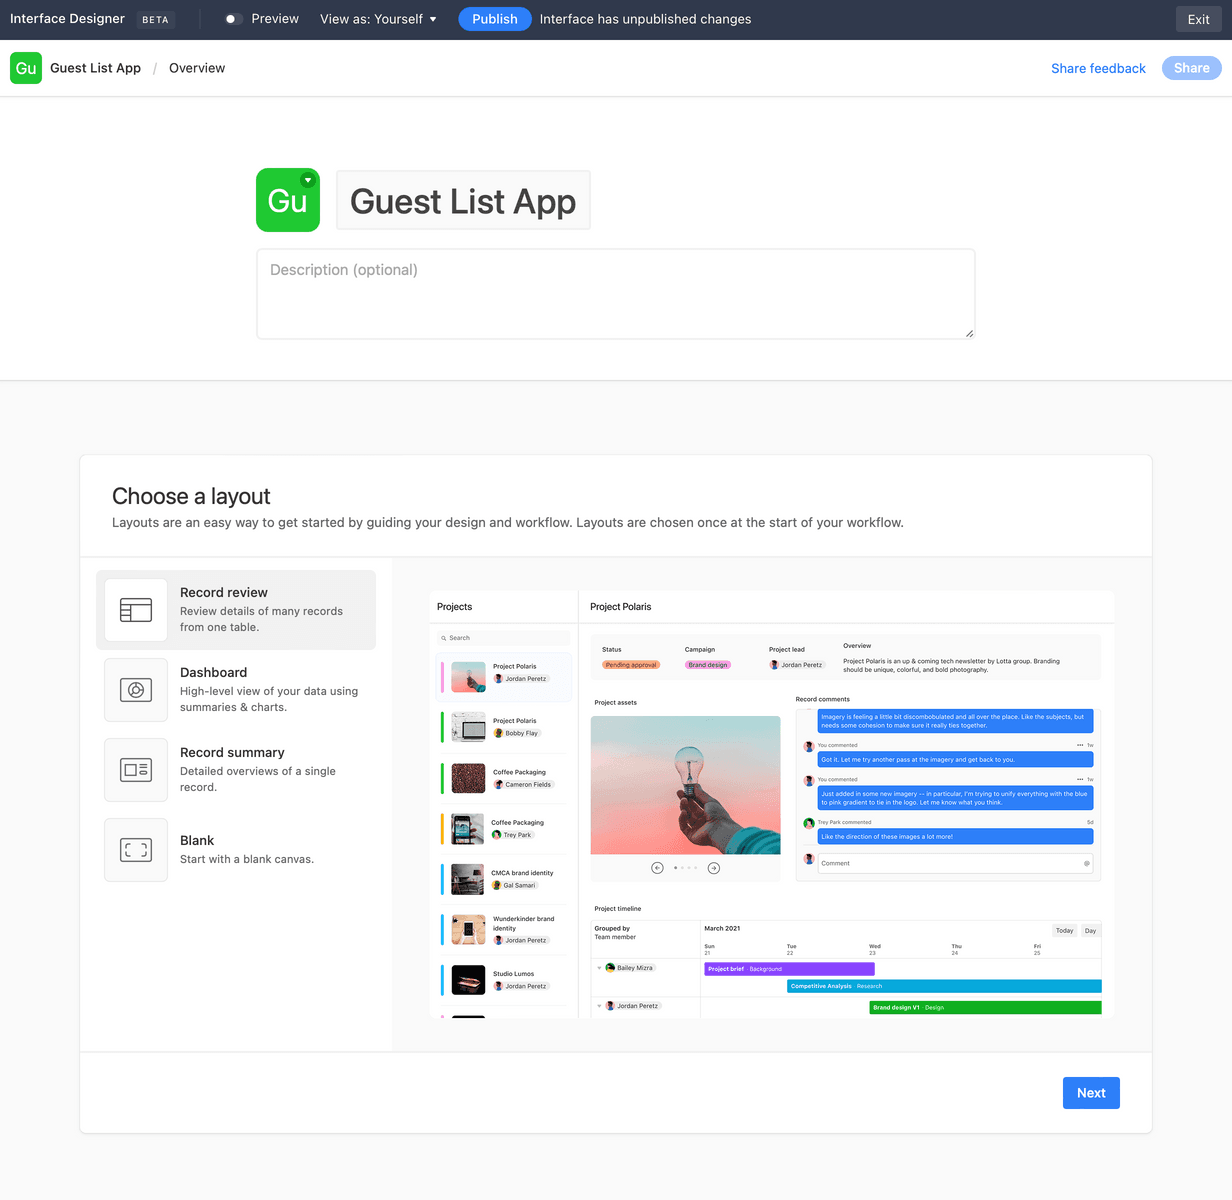
You may leave the defaulst in next steps, but name your first layout such as "All guests".
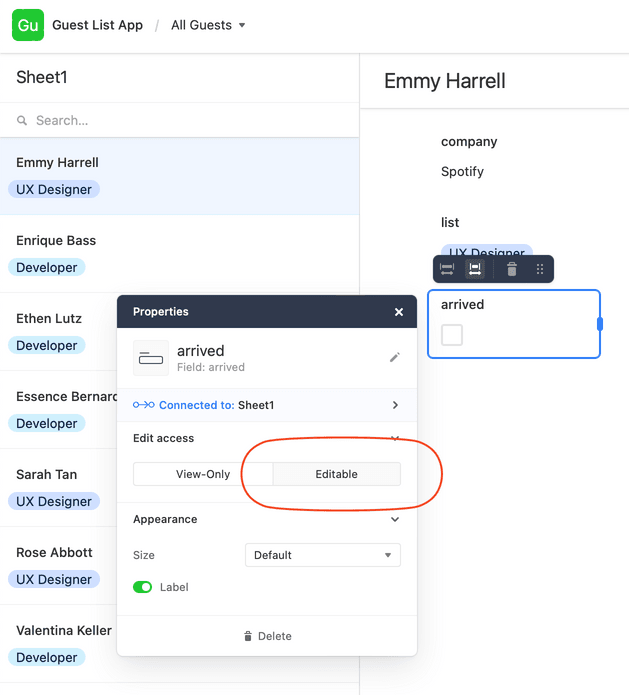
Now select "arrived" field at right panel, change it to "Editable", this way you may click and change the check-in status for each guests.
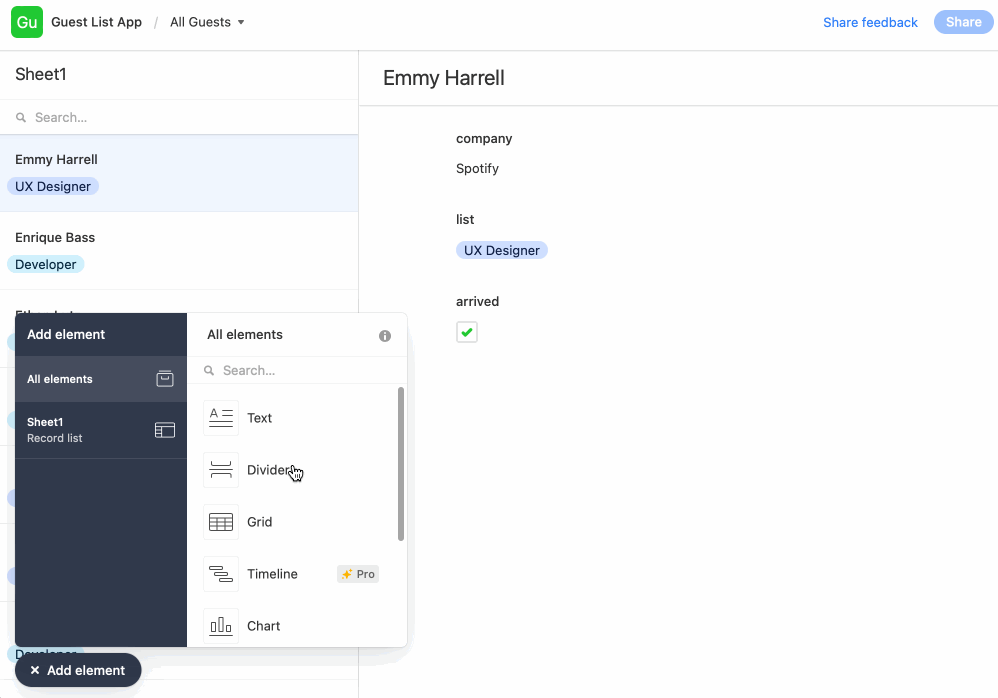
Now we want to shows some summary or analytics of the checkin status of all guests. Follow the gif instructions below:
Test
You may toggle the "preview" button on at the top to test the app in your browser now. Then publish the app and share it with your team.
If you want to use the app on an iPad, you may login airtable from Safari and start the app from there. So this is more like an custom UI within the airtable app rather than a standalone app.